What have I been eating lately?

Standard

Here’s a little photo documentation of some of the meals I’ve made over the past month:

IMG_3005

Minestrone soup (recipe courtesy of Jamie Oliver). A rainy night essential.

IMG_3019Breakfast with all the stops… pancakes, bacon, eggs, coffee, and fresh fruit. My ultimate luxury.

IMG_3071Asian chow mein noodle stir-fry with tofu, BC corn, and edamame. Easy peasy – I now know why I grew up eating so much stir-fry on week nights.

IMG_3100

Last night’s dinner…my latest obsession: gnocchetti with pesto, blistered tomatoes and chicken. Among the fastest and easiest in my dinner repertoire. Sautee gnocchetti in olive oil until slightly browned while halved grape tomatoes roast in the oven with olive oil, rosemary and balsamic. Toss in a bowl with pesto. Done. This is a bit of a cheater meal considering the gnocchi and the pesto are store bought, but it’s extremely satisfying after a long week. As an end of the week treat, I also popped a new bottle of red wine (a recommendation from my sister), the Campo Viejo Rioja Tempranillo 2012.

To the next deliciously simple meal,

Grace

Quinoa Salad

Standard

First off, it’s been a while. I’d say it’s the curse of a new blogger: you get wrapped up in the idea of it with the first couple of posts, and then you just stop because it’s actually a bit of work.
Anyway, I’m back. For how long? I don’t know…we’ll see how it goes.

I’m back in school in Vancouver living the city life and cooking all my meals (for the first time). It’s been about about 3 weeks, and I’ve learned a couple things:

1. My mom is a rockstar. This is not necessarily a new fact, but after having to plan, shop and cook all my meals, I’m very appreciative of how many years she did all that every night for the family…it’s a lot of work!

2. I really like cooking as a de-stressing activity. However, it is also the last thing I want to to after 9 hours at school.

3. Stir fry is you’re best friend…

4. And so is the freezer.

So with all those things kept in mind, you can probably guess that I’ve been cooking pretty basic things.

While all I wanted to do tonight after dinner was cuddle up in my bed with the season finale of one of my favourite TV shows, I stuck to my guns, put on my latest playlist, and cooked a big old bowl of food. I’ve discovered the advantage to cooking large quantities of one thing and then saving the extra leftovers for many fast meals throughout the week.

Without further ado, here’s my quinoa salad:

IMG_3070

I know you’re supposed to keep these types of things simple, but while I was cooking I just felt like adding more things in, I had to restrain myself before I added more though, so I’m sure a reprise of this with other ingredients (I’m thinking dried fruit) will happen soon.

The goods:

** Warning: if you’re cooking for one be prepared to have a bit of fridge space open to store the leftovers, this recipe made about 8 cups!

2 Roma tomatos, diced
1/4 cup red onion, finely diced
1/3 cup roasted almonds, diced (I roasted mine myself in a sautee pan with a little olive oil)
1/2 cup feta cheese, crumbled
3/4 cup cucumber, diced
2 tablespoons diced green onion
2/3 cup chopped olives [I used the ones I had on hand (green stuffed with garlic and jalapeno, a favourite of my dad’s) but if I had my druthers I would’ve used kalamata]
1 1/2 cups kale, deveined, chopped finely and massaged with 1 tablespoon balsamic vinegar (it cuts the bitterness and tenderizes the greens)
Salt and pepper to taste
(A chicken breast would be a great addition to this or to go alongside for a dose of protein)

1 cup dry quinoa
1 tablespoon olive oil
2 cups water

The dressing: (this is a Nychka classic)
2 1/2 tablespoons balsamic vinegar
2 1/2 tablespoons olive oil
2 1/2 tablespoons dijon mustard
2 teaspoons honey

First, rinse the dry quinoa (this helps get rid of the bitterness). After rinsing, put the quinoa in a small saucepan with the oil and roast it on medium heat for a minute or two (this is also to get rid of the bitterness). Then, add the water, bring to a boil and then cover and simmer on medium low heat for 10-15 mins.

While the quinoa is cooking, prep the rest of the ingredients and combine in a large mixing bowl.

IMG_3059

For the dressing, combine the vinegar, oil, mustard and honey in a bowl and whisk together (or if you’d like to do it with true Nychka style, put it in an bottle or jar and shake). If it’s too vinegary add a bit more honey, if it’s too sweet, add a bit more mustard or vinegar. The mustard is truly key in this dressing, it makes it emulsify really easily with hardly any mixing, and it gives it a bit of depth of flavour.

IMG_3068

Add the quinoa to the large mixing bowl and pour dressing over top. Mix together and salt and pepper to taste.

Here’s to picking up where I left off!

Strawberry-Rhubarb Mini Pies

Standard

IMG_2556

Yum! Just looking at those words makes my mouth water.

I’ve already mentioned that brats are a summer food fave of mine, but another major one is pie. I just love pie.

So, in the spirit of summer, pie-lovers, a day off work, and snacks to accompany tonight’s episode of The Bachelorette, I’m making mini pies.

For the crust I used Julia Child’s (almost) recipe for a classic sweet pie dough, I say almost because it calls for cake flour and shortening which are two things that I don’t normally have on hand, so I just substitute butter and normal flour for those and it comes out just fine. The recipe is as follows:

2 cups all-purpose flour

1 1/2 sticks (3/4 cup) chilled butter

2 tablespoons sugar

1/4 teaspoon salt

1/2 cup (more or less) iced water

In the words of the master herself, proceed as follows: With metal blade in place, measure the flour into the bowl of the machine, cut butter rapidly into pieces the size of your little-finger joint, and drop into the flour, along with the sugar, and salt. Using the on-off flick technique lasting 1/2 a second, press 7 to 8 flicks, just to start breaking up the butter.Then, with water poised over opening of machine, turn it on and pour in all but 1 tablespoon of the iced water. Proceed in spurts, on and off, just until dough begins to mass together but is still rough with some unformed bits.

Turn it out onto your work surface and mass together rapidly with the heel of one hand into a somewhat rough cake. (Dough should be pliable -neither dry and hard nor, on the other hand, sticky. Pat in sprinkles more of all-purpose flour if sticky; cut into pieces and sprinkle on more water if dry and hard, then reform into cake.)

Sorry about the quality on this one, I forgot to document my dough process, so these are from the Julia Childs cook book!

Sorry about the quality on this one, I forgot to document my dough process, so these are from the Julia Childs cook book!

Wrap in plastic and refrigerate for at least an hour, to congeal the butter in the dough so that the dough will roll easily, and to allow the flour particles to absorb the water so that it will handle nicely and bake properly.

Wow, thanks Julia!

This recipe is deliciously fool-proof, quick and easy; it makes pie- making a cinch. Big thumbs up for this one!

Now for the Filling:

(makes enough to fill 9 or 10 mini pies)

2 1/2 cups chopped rhubarb

2 1/2 cups chopped strawberries
*The size of the pieces depends on how small or large your pies are. Since I was doing mine in a muffin pan, I chopped things fairly small so that they can cook through properly and in the same time frame as the crust. No one wants an overdone crust and under done filling.

2 1/2 tablespoons flour

1/2 cup sugar (you can bump this up to 3/4 or 1 cup if you like a sweeter pie, I like mine fairly tart)

1/2 tsp cinnamon

In a bowl combine the fruits, and then add the sugar, flour, salt and cinnamon and gently toss together.

IMG_2537

Now for some crust work. Take the dough rounds out of the refrigerator and roll them out on a lightly floured work surface. Cut rounds for the bottom crusts of the pies, I used a bowl that was about 5 inches in diameter which worked perfectly for a standard muffin tin.

IMG_2545

Put the dough round in the pan to form the bottom crusts. Fill each crust with filling and then top them off. I experimented with lattice and complete tops, but you could also use a streusel topping if you like.

These pies were super juicy, it started leaking out before they even reached the oven.

My fruit was so juicy that it started leaking out before they even reached the oven.

Brush the tops with butter and a sprinkle of sugar. Bake in a 350 degree oven for 50 minutes or until filling is bubbling and crust looks cooked.

The juice got super messy and got all over when they were baking. If you think this might happen to you, put a cookie sheet under the muffin tin in the oven, so the juice doesn't drip all over the oven and burn.

The juice got super messy and spread all over when they were baking. If you think this might happen to you, put a cookie sheet under the muffin tin in the oven, so the juice doesn’t drip out of the tin and all over the oven and burn.

While the cuteness factor on these guys is incredible, they were a bit tough to get out of the pan whole. If I make them again, I might experiment with using muffin liners instead of just greasing the tin.

Overall though, they turned out really yummy, even if some of them did just fall apart.


Pasta with Homemade Pesto and Roasted Grape Tomatoes

Standard

IMG_2447

I’m house sitting, again. I have lots of time to cook, again. This time I was inspired by some incredible fresh basil growing in the garden; I couldn’t resist making pesto.

IMG_2431

Here’s what you’ll need to make enough pesto for 2 servings of pasta which ended up being about 2/3 cup pesto:

1.5 – 2 cups basil leaves

3 – 4 tablespoons olive oil

1 clove of garlic, peeled

1/4 cup grated parmesan cheese

3 tablespoons pine nuts

1/2 teaspoon salt (or to taste)

I’m all about cooking with as few dishes to wash as possible so I used an immersion (stick) blender to make my pesto. Although it was minimal dishes and was perfect for a small portion, I did have to get creative and fashion a little cover so that the pesto wouldn’t get everywhere when I was blending.

IMG_2434

Start with just the garlic and salt and blend it as much as you can, then add the basil leaves.

IMG_2435        IMG_2437

Blend for a couple seconds and then add half the oil.

Add the cheese and pine nuts and the remainder of the oil and blend until smooth.

IMG_2440        IMG_2441

Bam! Delicious fresh pesto in under 5 minutes.

IMG_2444

While I was making the pesto, my tomatoes were on the grill.

All I did with the tomatoes was cut them in half and put them in a round pan with about 1 1/2 tablespoons olive oil, a clove of finely chopped garlic. and a sprinkle of salt.

IMG_2442

I shook them around a bit to coat them in the oil and then I just popped the pan on the grill. I would’ve loved to spash some balsamic vinegar on those suckers, but this isn’t my kitchen and I couldn’t find any. I waited until the skins were shriveled (about 7 mins). Halfway through, I threw some marinated artichoke hearts in the pan to heat them up.


Brats are one of my favourite summer foods, there so quick to cook, they taste great and they can go on top of practically anything. I grilled one of those up and cut it to top the pasta.

Here’s my finished dinner, I chose whole wheat rotini as my pasta, to get some whole grains into my system. I have a terrible soft spot for junk food, although I starting to train myself to eat better, ergo whole wheat pasta… I know very small step, but it gives me peace of mind anyway.

IMG_2446

An Adventure (more like just a typical day) with Anna

Standard

A couple nights ago I went to go see the movie Chef with my best friend, Anna and her mom, Carol. We all loved the movie and it made us really crave some latin food truck food.

Carol has one of the best jobs ever: she’s a restaurant critic. Over the past 7 years I’ve been friends with Anna, I’ve had the pleasure of going along on many trips with Carol to restaurants she’s reviewing. Because of her job Carol always knows about the coolest up and coming foodie places and she is always so enthusiastic to share them with everyone.

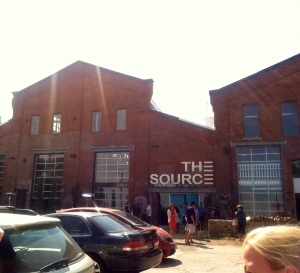
After seeing Chef, we got talking about awesome places for food. Carol suggested we take an outing to a place called The Source the next morning to get some breakfast.

So, the next morning, we departed for the sketchy Denver neighbourhood, nicknamed “RiNo”, by the hipster gentrifiers.
Once we step foot inside, I automatically fall in love with this place. It’s a wearhouse renovated to be an industrial chic foodie marketplace. Unfortunately since we went so early there were only 3 little shops open: a barebones French bakery, a little cafe and a gourmet foods shop.

IMG_2378

IMG_2382

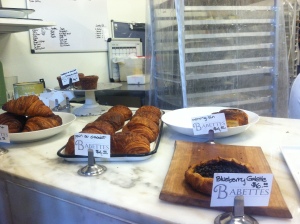
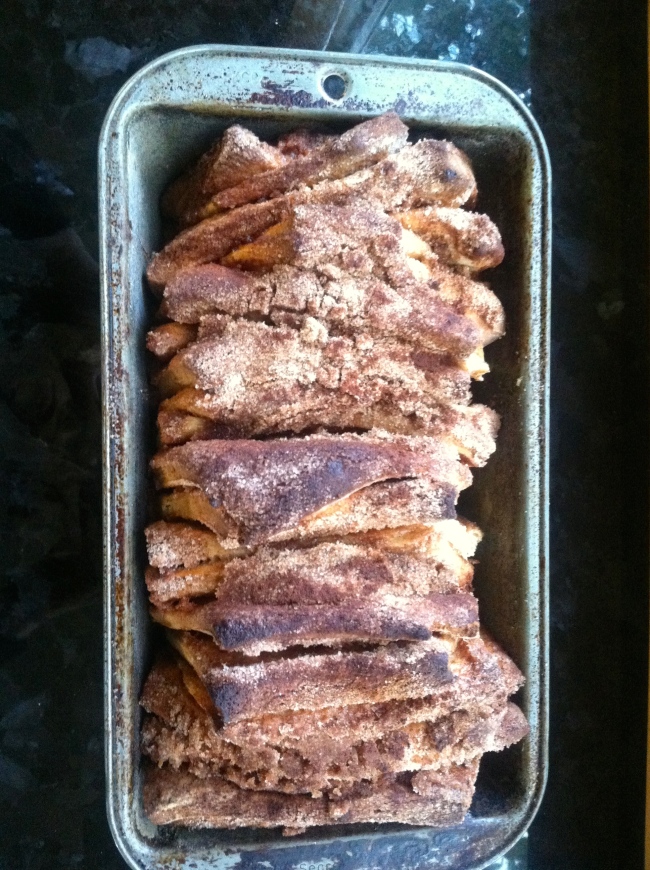
We had french pastries and coffees, both were delicious, of course.

IMG_2388      IMG_2394

After The Source,  we went back to Anna’s house and started making lunch. I know, we just ate breakfast and now we’re already into the next meal. What can I say? My life just revolves around food.

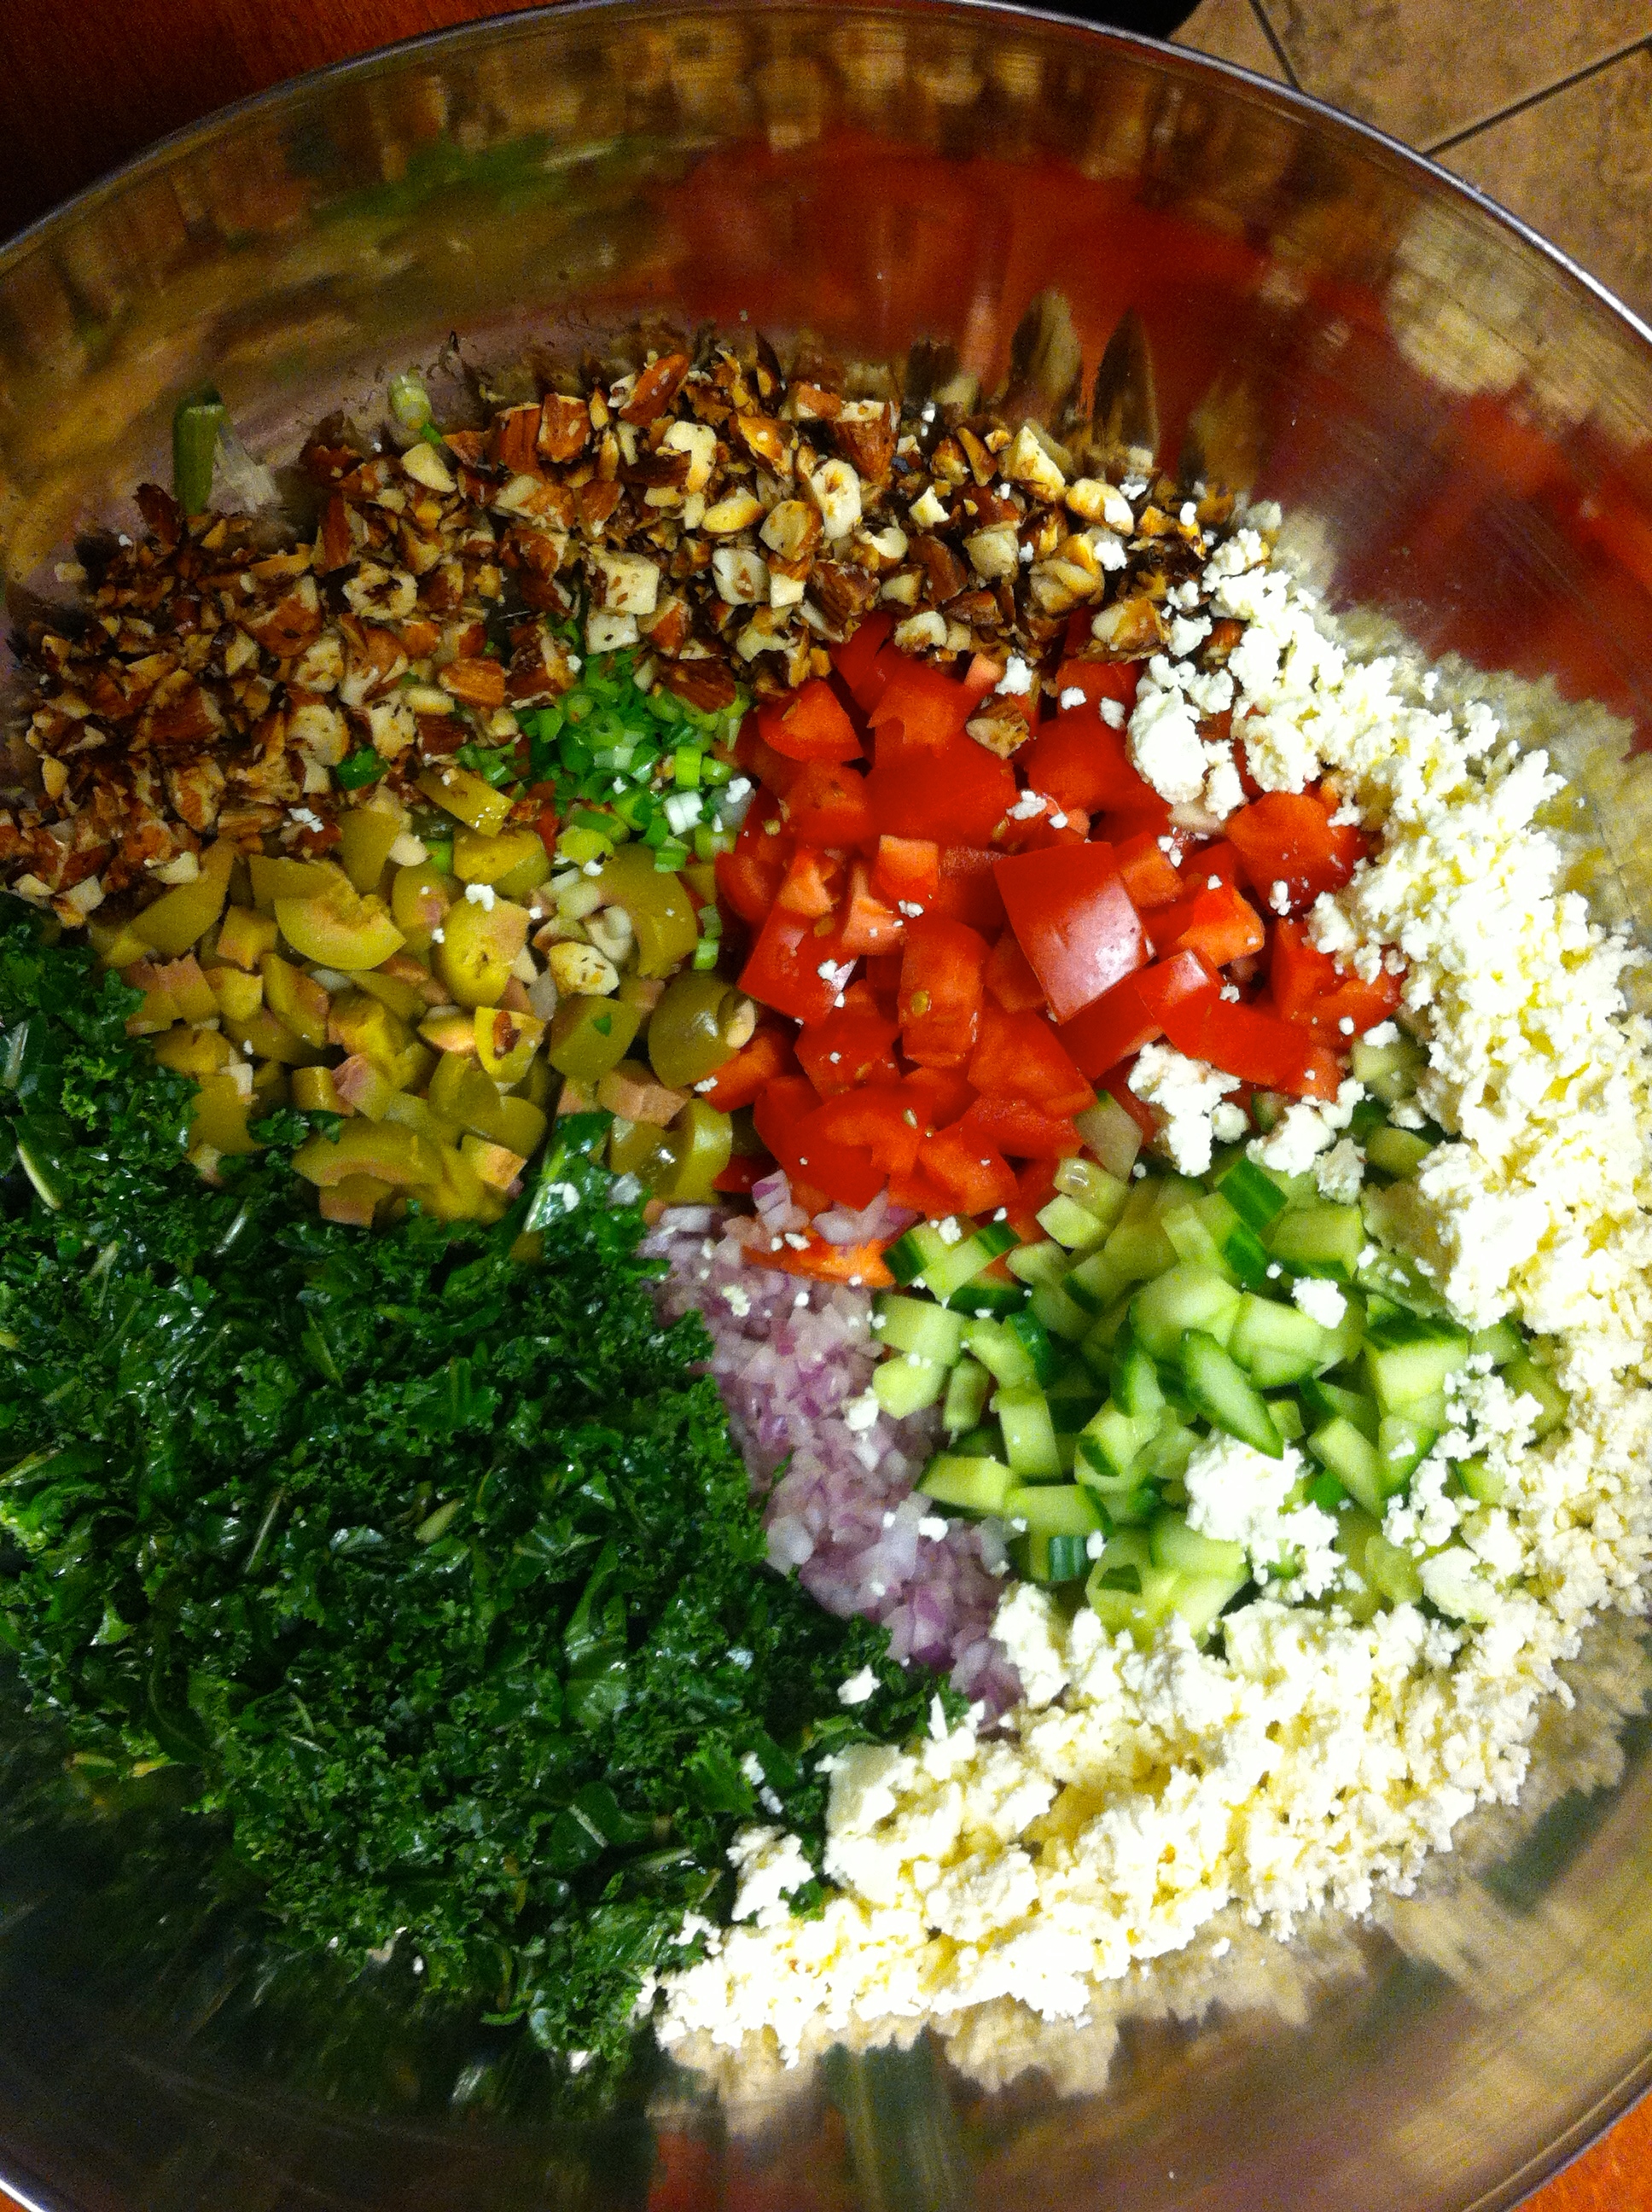
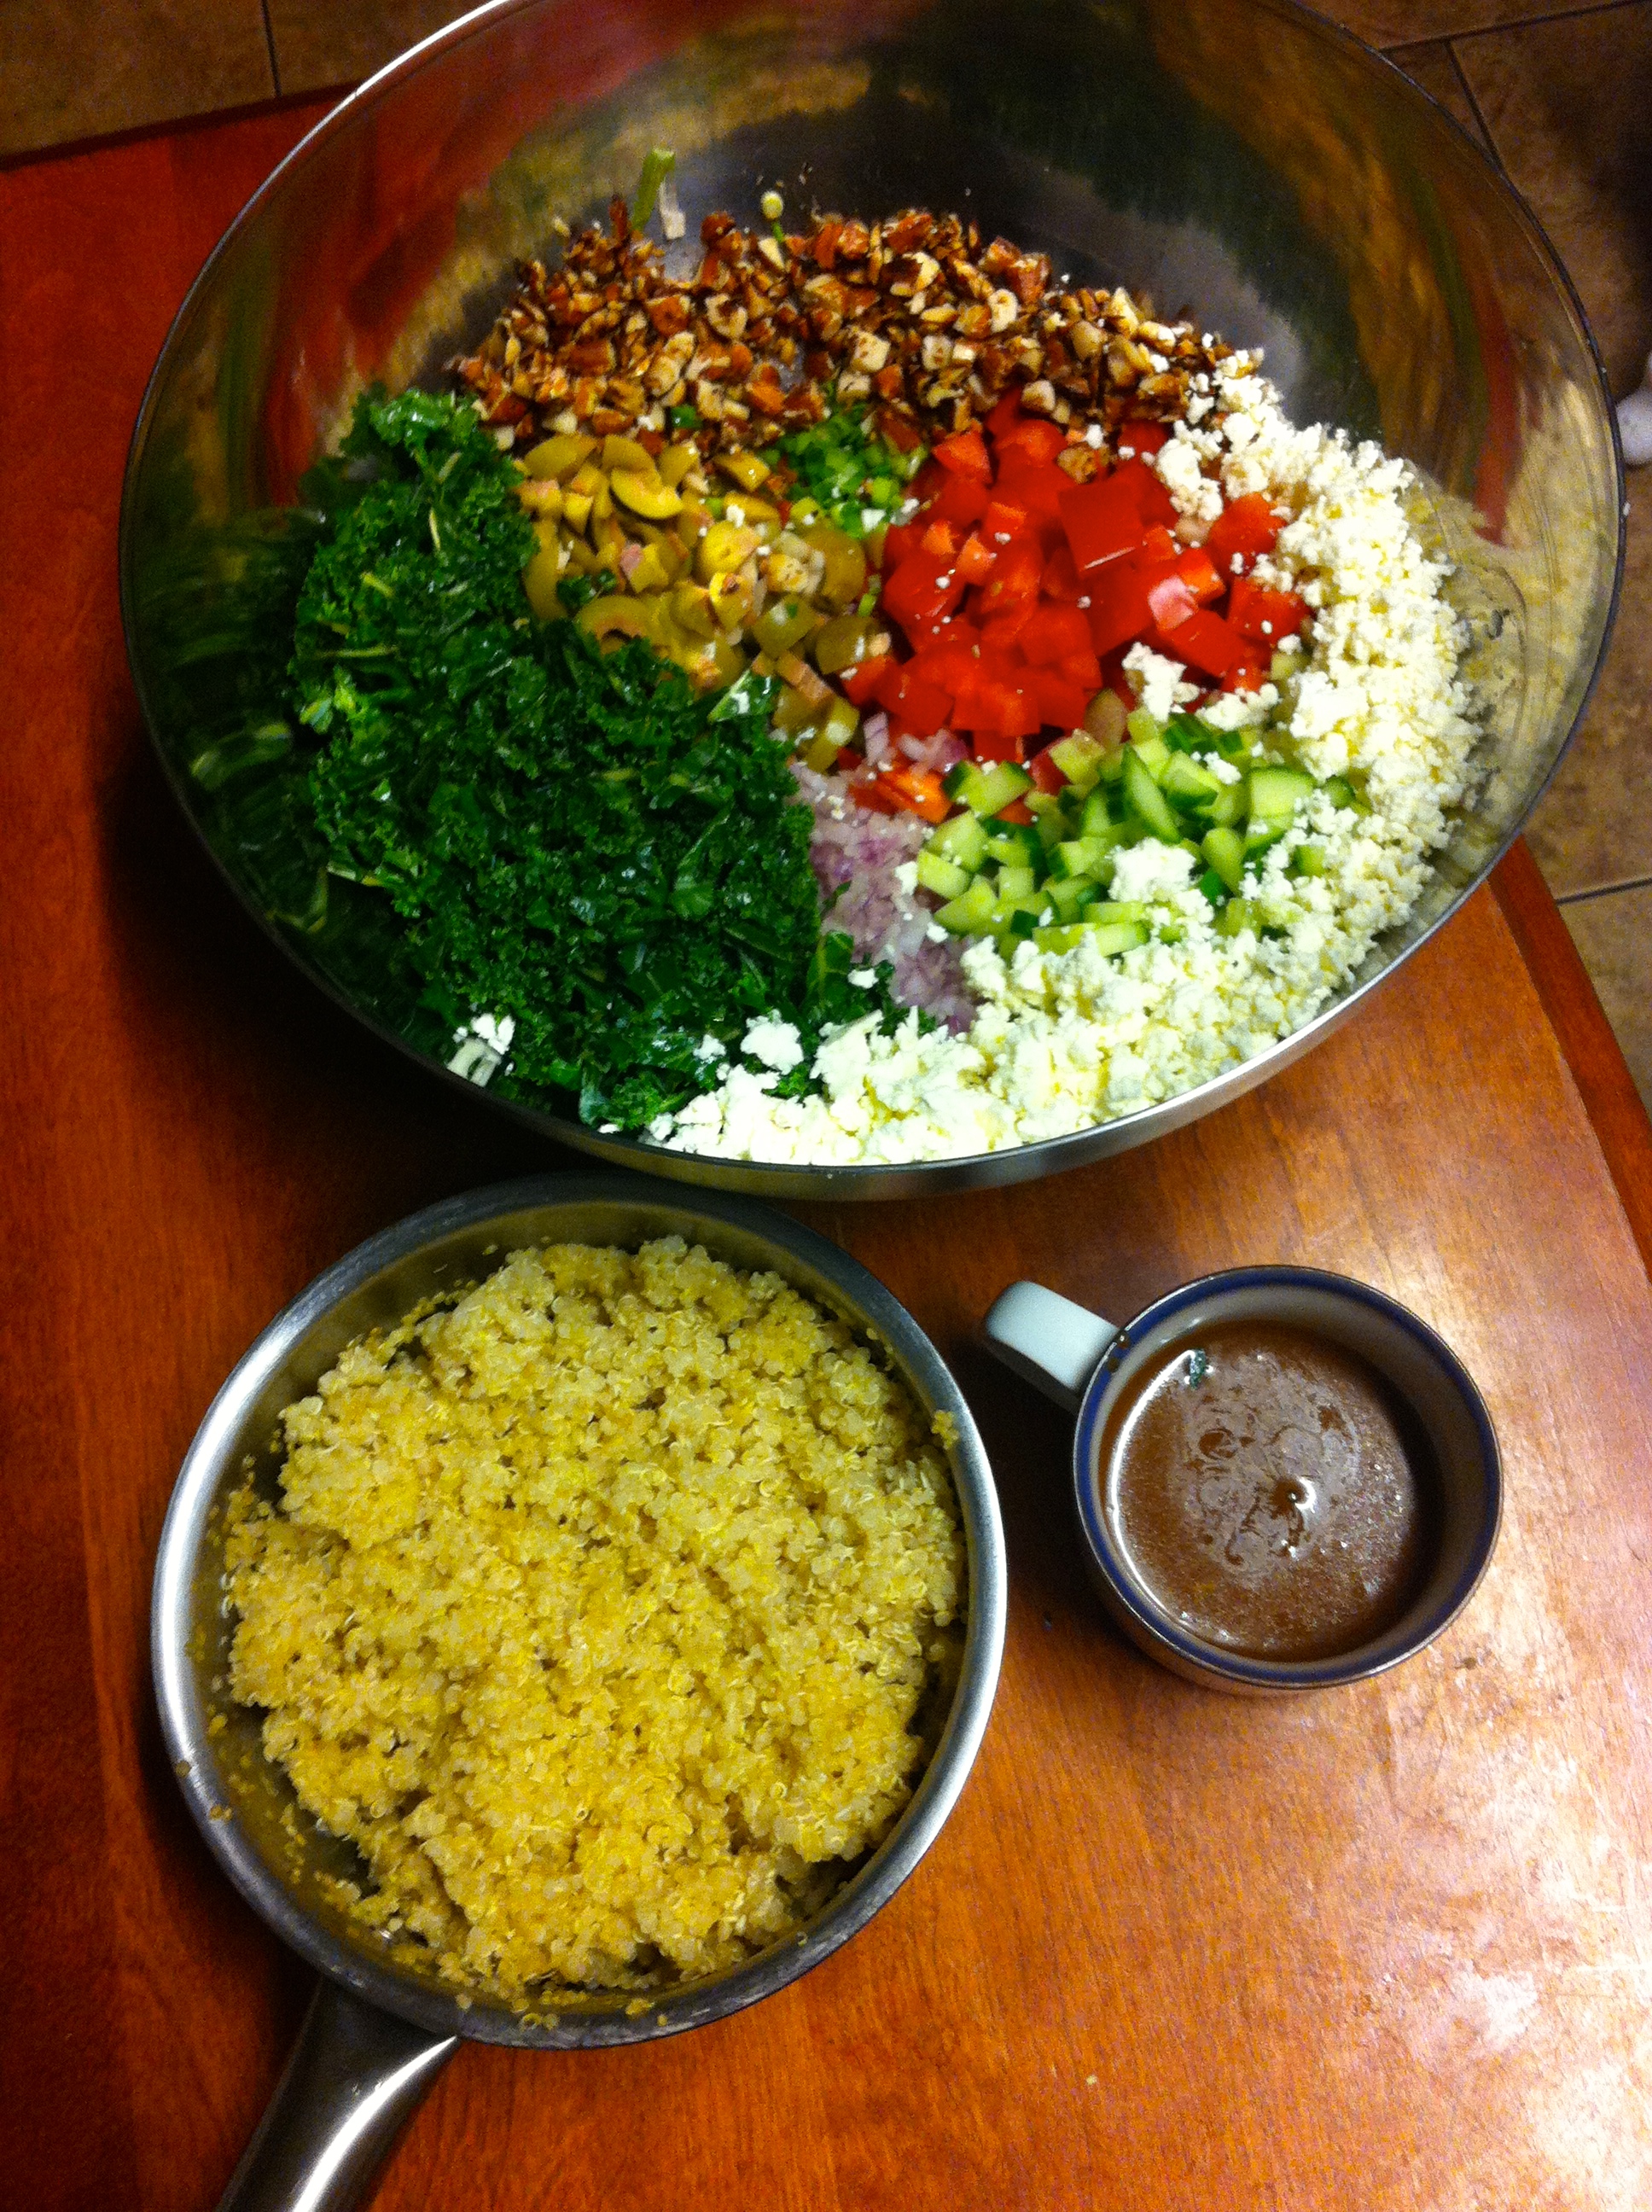
After scoping the kitchen for ingredients, we decided on a salad.

Let me just make a note about Anna’s kitchen. Carol not only is a super talented writer and taster of food, she also went to cooking school and is a phenomenal cook. Due to this Anna’s kitchen is the best place to cook. They always have a ready supply of interesting gourmet ingredients and practically any type of pot, pan or cooking utensil you might need.

Here’s what we made:

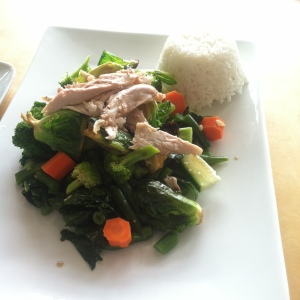
Roasted Brussels Sprout and Kale Salad with Chicken (and a whole lot of other delicious things)

What You’ll Need:

*A note about the amounts of the ingredients: salad to me are a very free form type of cooking and very adaptable to individual likes. We chose brussels sprouts to be the main player, but if you prefer broccoli, tweak the proportions to highlight what you like.

1.5 pounds of brussels sprouts (halved)

A small bundle of kale, de-veined and chopped into small pieces

A small head of broccoli, cut into bite-sized flourets

1 medium sized carrot, peeled and cut into 1 inch pieces

1 1/2 cups cooked green beans, cut into 1 inch pieces (These were leftovers we found in the fridge. I find salads are a great way to use up things you have sitting in the fridge.)

1/2 of an english cucumber

1 cooked chicken breast, cut into bite-sized pieces (Also a leftover)

2 inches fresh ginger root, peeled and minced

Rice Vinegar

Bragg’s Liquid Aminos (if you aren’t familiar with this it’s a salty brown sauce that’s very similar to soy sauce, but it’s a bit less intense and has a more rounded flavour)

Olive Oil

Sea Salt

Black Pepper

*A bit of hard goat cheese shredded for garnish, I can’t remember what type we had but manchego would be good too.


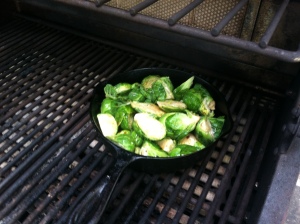
First, you need to start the brussels sprouts because they take the longest to roast. We roasted them on the grill using a technique Anna showed me that worked fantastically.

Prep the sprouts by cutting them in half and put them in a 10-inch cast iron skillet. Sprinkle some olive oil, Bragg’s Liquid Aminos and a bit of salt and pepper over them and put the pan directly on the grill. Close the lid and leave them to roast for 10-15 mins until tender and slightly browned, giving them a jostle/stir about every 3 minutes.

IMG_2397
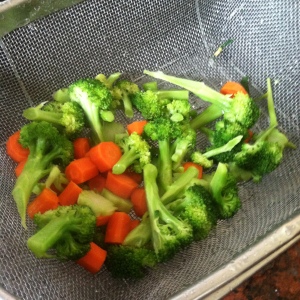
Next, prep the broccoli and carrots and steam them until tender in a small sauce pan. Don’t forget to spray them with some cold water after draining them to keep them from over cooking once they’re off the heat.

IMG_2409

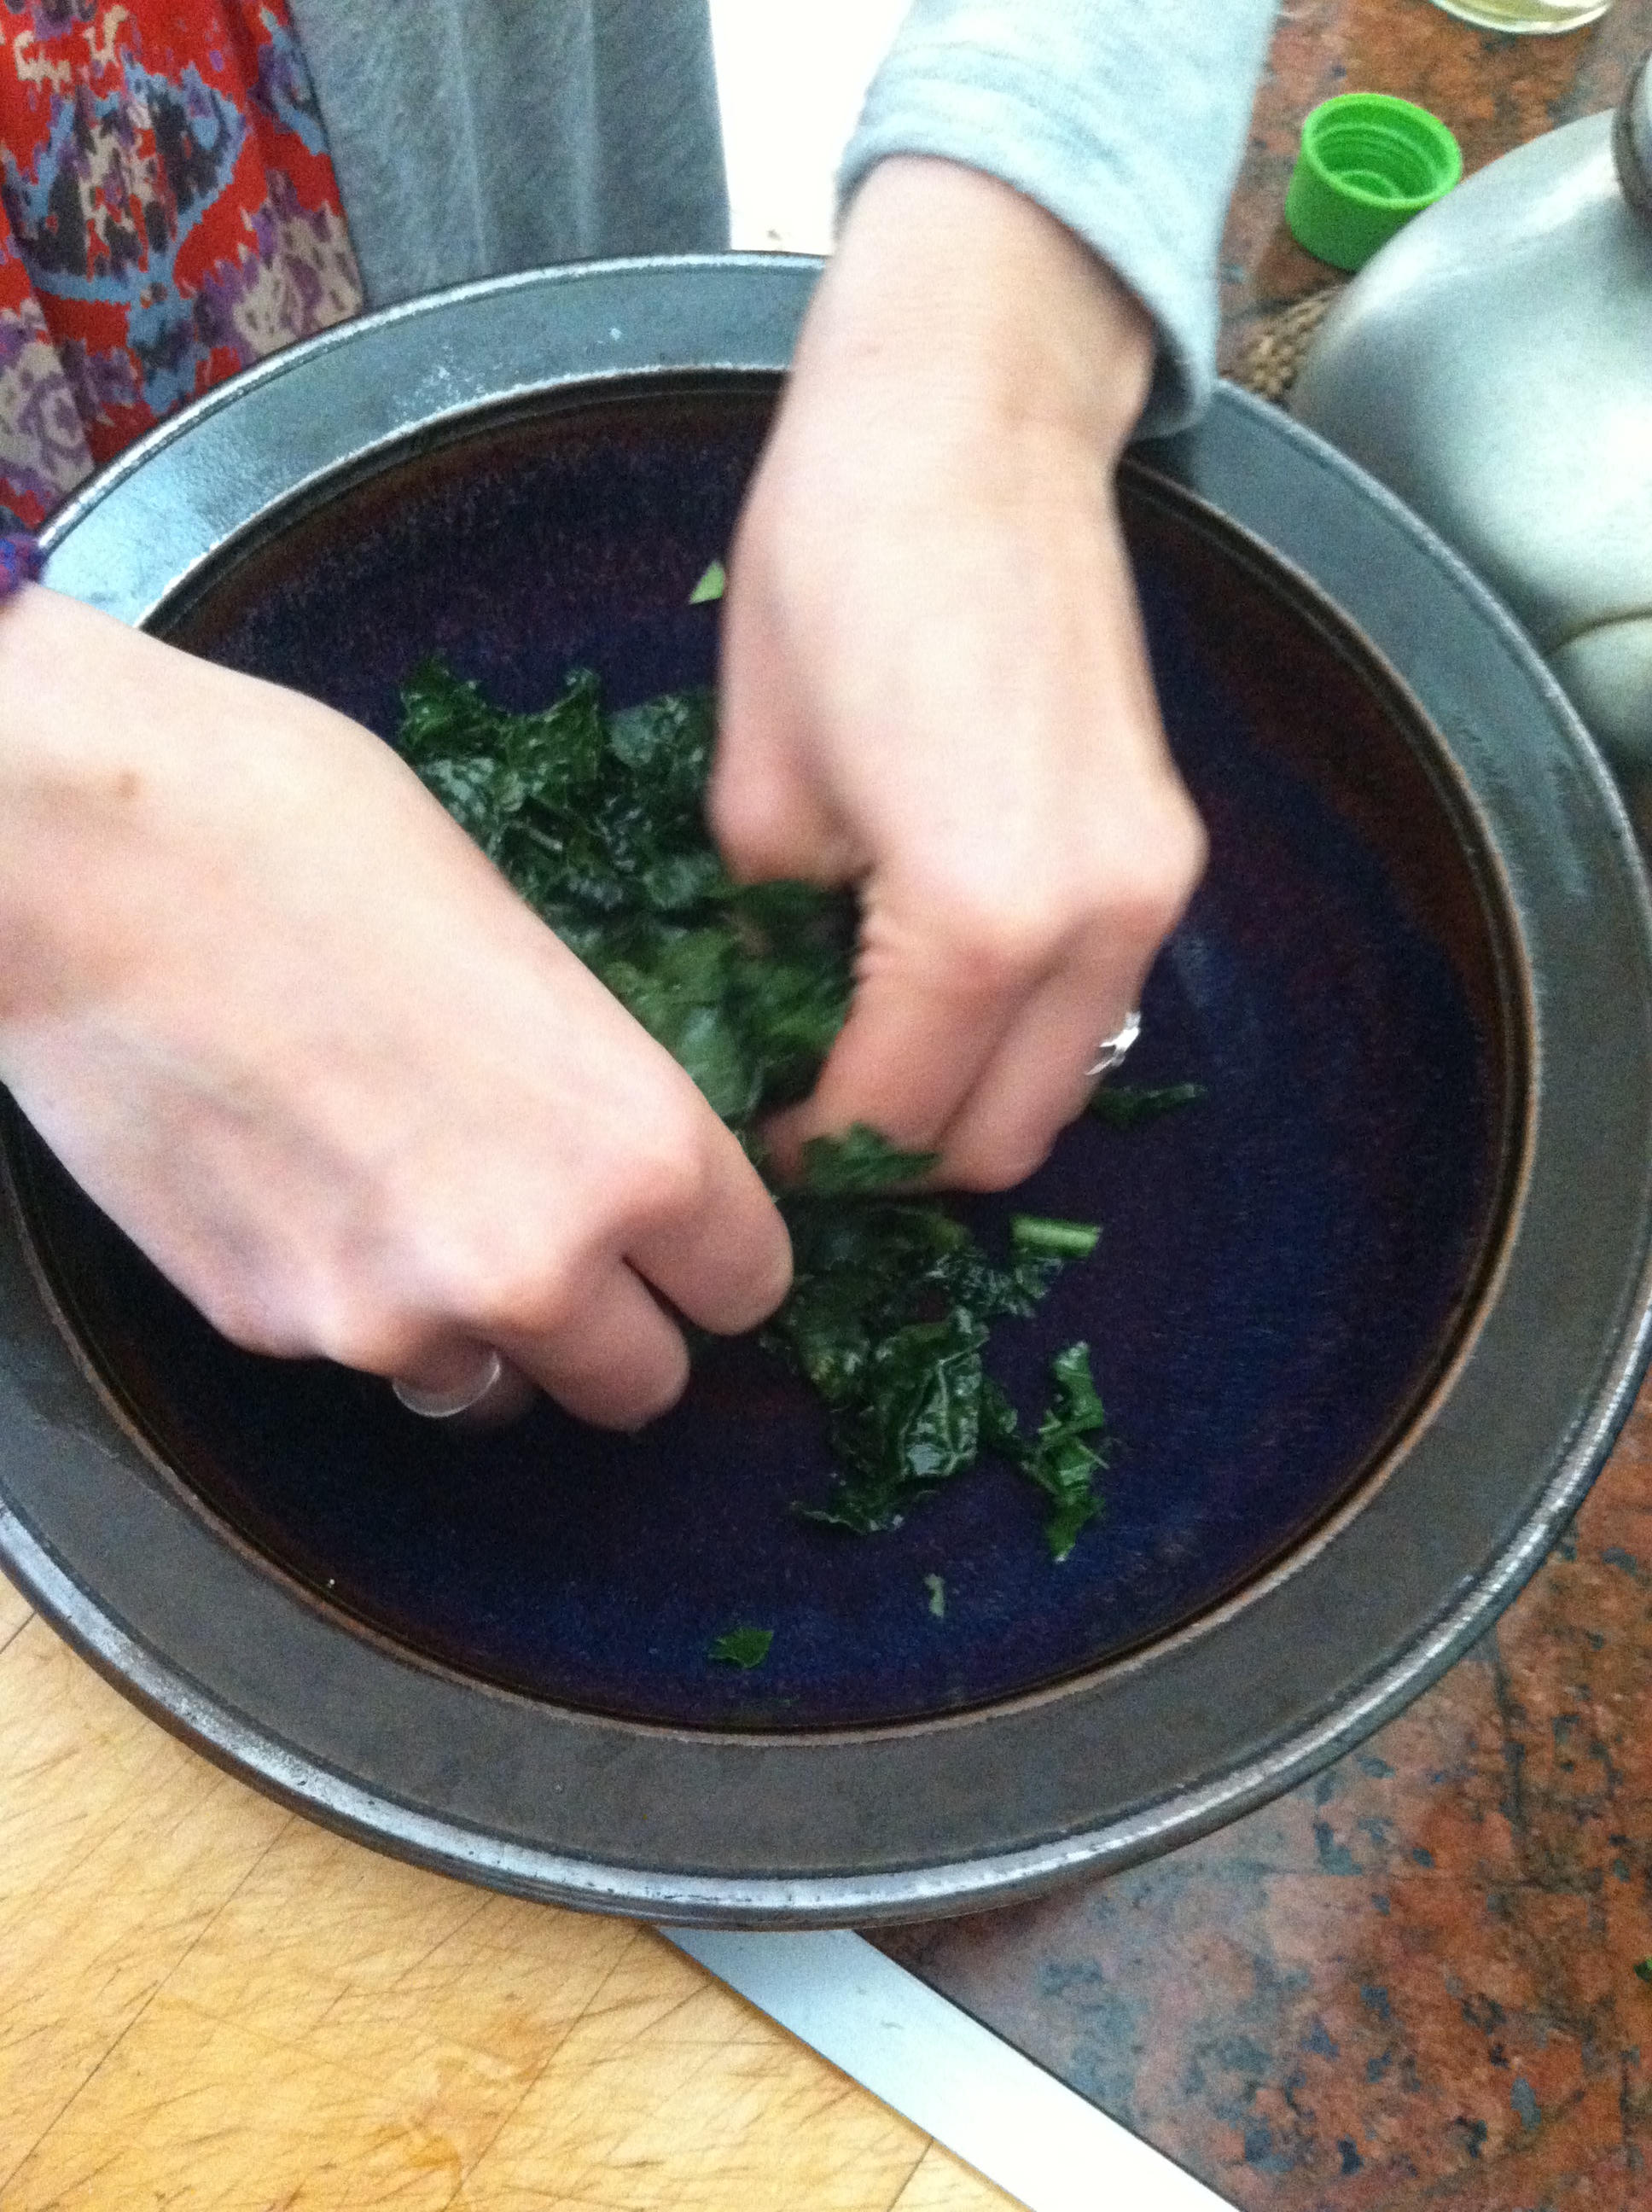
While the roasting and steaming is happening prep the green beans, ginger, cucumber, kale and chicken.

Once you’ve de-veined and chopped the kale put it in a bowl with some rice vinegar and massage it. 

IMG_2399
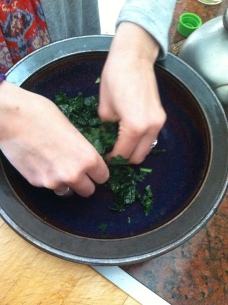
This sounded weird to me too, but Anna assured me that chopping the kale small and massaging it with vinegar is a trick to make it less bitter.

Next, add some liquid aminos, the ginger, cucumber and the green beans to the kale and give it a mix. Don’t be afraid to over dress this mixture a bit because the broccoli and carrots aren’t seasoned at all.

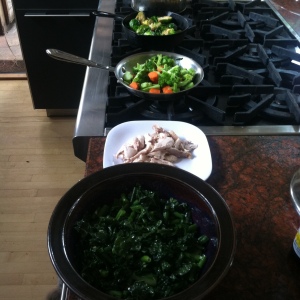
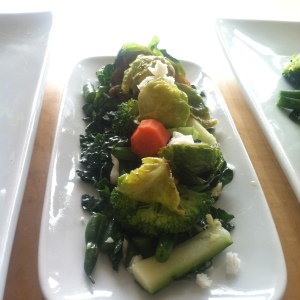
Once the sprouts and broccoli and carrots are done, you’re ready to plate!

We kept everything separate until we plated so that we could place everything where we wanted, but you could give it all a mix together before plating if you so desire.

IMG_2412

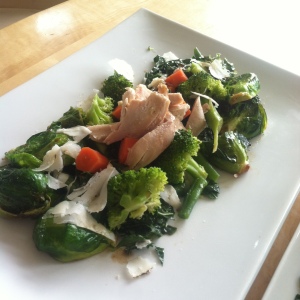
This is the delicious finished product.

IMG_2415

We did some special plating just for fun.

IMG_2418

IMG_2417

IMG_2416

Here’s to the next week: hopefully it will be filled with some more delicious eats!

Things I’m Currently Loving

Standard

Here is a little list of things I’ve been enjoying recently:

1. Chris Lilley

Chris Lilley as the characters in Summer Heights High: (From right to left) Jonah Takalua, Mr.G, Ja'mie King.

Chris Lilley as the characters in Summer Heights High: (From right to left) Jonah Takalua, Mr.G, Ja’mie King.

Chris Lilley is an amazing aussie comedian who really appeals to my sense of humor. I first discovered him when my sister introduced me to Summer Heights High last fall.

Summer Heights High is an australian TV show set up as a mockumentary, which makes me immediately love it. (Side note: One of my favourite mockumentary movies is Best In Show, which if you haven’t seen you must.) The show chronicles the lives at school of the 3 main characters, Mr. G, a drama teacher, Ja’mie, a girl from private school who is spending some time at Summer Heights to experience public school, and Jonah, a polynesian troublemaker.

Chris Lilley does serveral different series with the same format: mockumentary style where he plays several of the main characters. His other shows include We Can Be Heroes, Angry Boys, Ja’mie: Private School Girl, and Jonah From Tonga (which is his newest work that started airing in May, I have yet to see this one). I think all of his series are fabulously hilarious, but I’ve recently started rewatching Summer Heights High with my best friend, Anna, who had never heard of it before but is also loving it.

2. Reading

Since summer has started, I’ve been trying to cut down on some of my screen time (normally I’m a ridiculous Netflix junkie) and I’ve been really enjoying spending afternoons reading. I’ve mostly been reading fluffy, quick-read books that I can rip through.

I just finished reading Across The Universe by Beth Revis, and, I know what you’re thinking, Isn’t that some terrible musical movie about the Beatles starring the guy from 21? Yes, there is a movie called Across the Universe, but this book is in no way even remotely related to that. This book is fantastic!

I’m not a huge sci-fy person, normally I find it too weird and far fetched, however, I’m a huge futuristic dystopian society fan (I loved The Hunger Games, both the books and the movies).

At first, I was a bit skeptical about this book, but after the first chapter I was totally hooked. The plot circles around a girl who was cryogenically frozen with her parents, so that they could be part of a mission to colonize a new planet. They are supposed to wake up 300 years later when they arrive at the new planet, but somehow she is abruptly awoken 50 years before the ship is scheduled to land because someone tried to murder her. The story follows the girl as she trys to find her killer and adapts to life on a ship which is lead with secrets and lies.

The only thing I didn’t love about this book was that it is a young adult book, so I felt like I was reading something written for a younger demographic.

However, I would highly recommend this book for anyone who wants a captivating, but quick summer read.

Another young adult I read a month ago while I was in Mexico was Panic by Lauren Oliver, which I also thoroughly enjoyed and would recommend highly.


3. English Muffins

Thomas_product_EM_package_4812118101

This is a strange one but I’ve been having an english muffin almost every morning with breakfast lately, and I’ve really been enjoying them. They’re chewy and better than toast but just as easy.


4. My Brother’s Jawbone Mini Jambox

dsc06024-1379356588

Ever since he got this (and has been generous enough to let me use it a lot) I’ve been listening to music on this most of the time I’m at home. This thing is seriously cool. It is a speaker that can wirelessly hook up to any bluetooth device (but can also be used with an AUX cable). Not only is it loud enough to fill a room with music, it also has incredible sound quality with great bass. It has has a rechargeable battery that holds something crazy like 30 hours worth of power, and it’s incredibly easy to take anywhere (especially the Mini Jambox). I can not say enough awesome things about these things, except for their price tag (which is worth it). I have lots of friends that have either the mini or the normal one and they never have a bad thing to say about them.  A Jambox is definitely on my list of things I need to save up and buy. If you’re in the market for a wireless speaker and you’re willing to take a hit to the wallet to et something really high quality, get this.

There’s my random list of current favourite things! Cheers!

Homemade Pizza

Standard

This is a common dinner I had growing up. It’s fast, It’s easy and totally customizable for even the bratty little kids that hate every food or our friend that’s just a picky eater.

I used this pizza dough recipe because it’s fast (under 2 hrs including rising time). Although, if you have the time to plan ahead, I would recommend this one, because it gives you the type of dough that has lots of elasticity and can be tossed into a very thin crust.

The second recipe is from Alton Brown’s show Good Eats, which normally has some awesome recipes for basic foods. This brownie recipe with semi sweet chocolate chunks added is fantastic.

Here’s my rendition of the quicker pizza dough:

Ingredients

2 cups white all-purpose flour (I also had to add in 7 tablespoons extra during the mixing/kneading because the dough was sticky, due to that addition I might say go for 2 1/2 cups white flour and add on a tablespoon or so of water.)

2 cups whole wheat flour (Why not make it a bit more nutritionally beneficial? But, if you’re not on the flower-child, granola-y, healthy Boulder bandwagon you can just use all white flour)

1 teaspoon sugar

1 envelope active dry yeast (2 1/4 teaspoons)

2 teaspoons kosher salt

1 1/2 cups warm water

2 tablespoons extra virgin olive oil, plus 2 teaspoons for the rising bowl


Combine the flours, sugar, yeast and kosher salt in the bowl of a stand mixer and combine.

IMG_2355

While the mixer is running, add the water and 2 tablespoons of the oil and beat until the dough forms into a ball. This is where I had to add my extra flour. Knead until the dough is a smooth, firm ball. I just used my Kitchen Aid mixer with the dough hook attachment to knead the dough for the ease of it.

IMG_2358

Grease a large bowl with the remaining 2 teaspoons olive oil, add the dough, cover the bowl with plastic wrap and put it in a warm area to let it double in size, about 1 hour.

IMG_2359


IMG_2360 IMG_2361

Turn the dough out onto a lightly floured surface and divide it into 2 equal pieces. Cover each with a clean kitchen towel or plastic wrap and let them rest for 10 minutes.

Now you can shape the dough into the size and shape crusts you like.

IMG_2362

You can cook the pizza in the oven at 450 or 500 degrees Fahrenheit until the crust looks cooked (and the cheese, if that is one of your toppings, is melted) mine took about 8 minutes at 500 degrees Fahrenheit.

You can also cook the pizzas on the grill, to do it this way it’s best to shape the dough and cook the crusts on the grill for about 1.5 mins. add the toppings to the side with grill marks and then put the pizzas back on the grill under a careful eye for about 1.5 or 2 mins. This was my mom’s preferred method when we were growing up because we normally had these pizzas in the summer and since our house doesn’t have AC, the grill was a great way to cook without heating up the house with the oven.

Here’s my pizza loaded up prior to cooking. I put red sauce on it and topped it with artichoke hearts, stuffed green olives, herb crusted salami, fresh mozzarella, red onions, grape tomatoes, a sprinkle of fresh rosemary from the garden, parmesan, and a drizzle of balsamic vinegar.

IMG_2363

And the finished product…

IMG_2364

with a Fat Tire of course! Yum!


Cinnamon Sugar Pull-Apart Bread

Standard

This weekend I’ve been house/dogsitting- AKA Grace has loads of time chilling by herself. Yesterday I had the craving for something sweet, so I decided I’d put some time to good use and make a treat for myself.

Enter Cinnamon Pull- Apart Bread.

I found this recipe about a year ago through Stumble Upon (an excellent way to waste time, and a must see if you haven’t checked it out before). I made it once before and it didn’t turn out very well, I think I set it on a rack that was too high in the oven because the top was a bit overdone but the middle was still doughy. However this time, it went swimmingly: have a look.

Image


The original recipe for this bread can be found here: http://joythebaker.com/2011/03/cinnamon-sugar-pull-apart-bread/

She makes it a bit more complicated than it really needs to be so I adapted it a bit.

Here’s my take on the recipe…

Ingredients:

For the dough:

3 cups all purpose flour (don’t add it all in at first, leave 3/4 C to mix in after the wet ingredients)

5 tablespoons granulated sugar

1 envelope active dry yeast (2 1/4 teaspoons)

1/2 teaspoon salt

1 1/4 teaspoons cinnamon

1/2 cup unsalted butter

1/3 cup milk

2 large eggs at room temp

1 teaspoon pure vanilla extract


For the topping/filling:

3/4 cup granulated sugar

5 1/2 teaspoons cinnamon

1/2 cup unsalted butter, melted


In a large mixing bowl combine 2 1/4 cups flour, sugar, yeast, and salt.  Set aside.

Whisk together eggs and set aside.

In the original recipe, it says to melt the butter and heat milk in a saucepan until just melted. I used the microwave instead of phaffing around with saucepans. Melt butter in the microwave, add milk. Let the mixture cool until it is warm but not so hot that it will kill the yeast. Add vanilla to milk/butter mixture.Image

Pour the milk mixture into the dry ingredients and mix with a spatula.  Add the eggs and stir the mixture until the eggs are incorporated into the batter.

Add in the remaining flour and knead it into the dough. I kneaded the dough in the bowl for two reasons: the first being that I was feeling to lazy to clean a workspace to knead on and the second being that the original recipe said to try not to knead in much extra flour.

This is what happened when I finished kneading in the flour and realized I hadn’t put in any vanilla. I ended up kneading it in and it was totally fine. At this stage, I had also noticed there was supposed to be 1/4 water in the dough, but I said screw it to that because it would’ve been a sticky nightmare to try and add in. This is demonstrating a spurt absent mindedness but also, not to make excuses, the layout of the original blog post recipe and the way it was written did not agree with my mind very well and I found myself not being able to read it thoroughly and missing things. Image

Now the waiting comes, place the dough is a large,  greased bowl.  Cover with plastic wrap and a clean kitchen towel.  Place in a warm space and allow to rest for 1 hour. (I allowed my dough to rest in the microwave, just because it was a bit warmer sitting in there than on the counter.) This is when I played the Sims to ease the wait.

*The dough can be risen until doubled in size, then refrigerated overnight for use in the morning.  If you’re using this method, just let the dough rest on the counter for 30 minutes before following the roll-out directions below.*

While the dough rises, whisk together the sugar and cinnamon for the filling. Melt 1/2 cup butter.  Grease and flour a 9x5x3-inch  loaf pan and set everything aside.

Image

On a lightly floured work surface, use a rolling pin to roll the dough out.  The dough should be 12-inches tall and about 20-inches long.  If you can’t get the dough to 20-inches long… that’s okay.  Just roll it as large as the dough will go.  Use a pastry brush to spread melted butter across all of the dough.  Sprinkle with the sugar and cinnamon mixture.

Image

Slice the dough vertically, into equal-sized strips measuring approximately 2 1/2 inches wide.  Stack the strips on top of one another and slice the stack into equal slices once again (I eyeballed this measurement by just looking at my pan, but don’t forget to leave rising room).  You’ll now have stacks of squares/rectangles which you will layer in the loaf pan. I had some extra cinnamon sugar at this point which I just sprinkled over top the dough in the pan; I also sprinkled some plain cinnamon over the top for good measure.

Image

Place a kitchen towel over the loaf pan and allow in a warm place for 30 to 45 minutes or until almost doubled in size.

Place a rack in the center of the oven and preheat to 350 degrees F.  Place loaf in the oven and bake for 30 to 35 minutes (mine took 40), until the top is very golden brown.  The top may be lightly browned, but the center may still be raw.  A nice, dark, golden brown will ensure that the center is cooked as well.

Image

Remove from the oven and allow to rest for 20 to 30 minutes.   Run a butter knife around the edges of the pan to loosen the bread and invert onto  a clean board.

This bread is best served warm the day of, but can be stored if wrapped at room temperature for up to 2 days.

This baking adventure was soundtracked by this 8tracks mix, http://8tracks.com/xeliserose/summersummersummer and accompanied by these little guys.

IMG_2351

Enjoy!


There’s a first for everything…

Standard

I’ve had the desire to start a blog for a while now, increasingly so in the past six months. It all started from my youtube addiction. Youtube, It’s ridiculously addictive. Whether you’re watching stupid fails, diy instuctables, music videos or, if you’re me, mainly beauty gurus blabbing on about the newest products they love smearing across their faces. Over the past year this love for youtube and connection to the people uploading videos and growing their channels has become a large part of my life. It’s actually become one of my hobbies… I know, one of my hobbies is watching people I’ve never met show me all the latest mascaras and facial cleansers they just bought at Sephora, it sounds terrible and introverted and consumeristic, but what the hell! I like it, and I’m okay with that.

Anyway, my growing involvement in watching youtube spawned the urge to create a youtube channel. After realizing that I don’t have a camera except for my Macbook webcam or my iPhone 4 to film with, I realized this may not be the right endeavour for me. Not to mention accruing viewership on a brand new channel, actually filming myself talking on camera and acting natural, as well as editing videos and posting them regularly. That’s lot of work.

After this realization, I left the youtube dream behind.

I arrived home from college much earlier than all of friends back home so I was left with lots of time to myself at home. I, of course, was watching loads of youtube, reading chick lit,  but also cooking and baking, which I have always loved.

I started floating the idea of me creating a blog instead of the youtube channel, which I actually kind of ripped off from my older sister, who was writing a blog a couple years ago. After looking back on some of her old posts, I started really loving the idea of just writing a blog for journalling purposes, even though I’ve never been a journaler. I’m hoping this blog will be a fun past time now and something that is a great memory to look back on later.

All in all that’s the long winded story to explain me and a blog.


Here, I’m hoping to create a sort of cross section of my life and interests. A collection of food and recipes that are delicious, homemade, not too labourious, and fairly cheap that will cater well to other young students like me starting to cook for themselves. Maybe some reviews on an array of beauty products that I find myself loving at the moment. Or even ‘outfit of the day’ s and fashion favourites.

Now I know the title of this blog is strange and practically jibberish, but I was having a hard time titling it and just wanting to put something there. I was trying to think of something clever and catchy but I was drawing a blank until I remembered last summer when my best friend, Anna, and I decided we wanted to start a cooking blog. We spent hours thinking up names for it, executing a recipe, and photographing the whole ordeal. In the end we never actually got around to writing that first post and starting the blog. Although the name we cam up with for it was Sunday’s Monkey. We got a huge kick out of that name and thought it was so perfect. Random, short, sweet, fun. It doesn’t make any sense… but in the end, does the title really matter?

So on that note, I suppose this first post is dedicated to Anna.

I’ll wrap this long rant up now, hopefully this won’t  be a ridiculous jumbled mess. Here goes nothing…